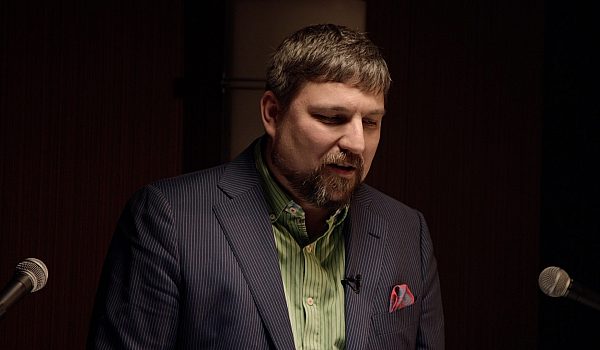
Node Stacking in Fusion is a mix between multi-pass compositing for 3D animation and pre-comping in After Effects. Unlike traditional multi-pass compositing, it can be applied to 2D text and graphics. Tony Gallardo demonstrates how to use Node Stacking for motion graphics.
With Node Stacking, you can make multiple instances of the same text and apply different effects. These might include glows, strokes, color corrections, and displacements. You can then composite them atop each other. Node Stacking allows for far more control over every aspect of the composition than possible otherwise.
- Thank you for coming out and supporting Faster, Together. And thanks for coming to NAB. So real quick, we're talking about Blackmagic Design's Fusion. And as you know, it's a motion graphics and visual effects compositing software. But today we're gonna talk about node stacking. And so what do I mean by node stacking? It's like a thousand different things, but I can only tell you 500. It's the idea of taking some multitask compositing, if you're coming from that world, and merging it with duplicating or smart cloning. But the base idea, the real job that I want you guys to understand is not just to do the standard base thing, like for example, just adding a glow, right? Add multiple, stack up your effects right? Node stack your effects to get more of an organic or just help you get a deeper look. So we're gonna start off real simple, now that I've definitely confused you guys, let's add a text node. So one thing I do want to mention is, you know, I added a 2-D text node, and the word stack is in there. And that's now how it is in Fusion, it's blank.
So any tool that you have in Fusion, if you find yourself just adapting or having to constantly change parameters before you even use it, you can just right click and make that the new default. So that's just something that kind of helps time save. So the background nodes or anything at all, you can just change it and that's the new default for you. So just a little quick helpful tip. So we're gonna add that glow. And let me go back and change the color here real quick. Alright, so we got our glow. And so let's just, with the idea of just dialing this back and adding in stacking and just kind of layering on top of each other, we're gonna add a blur node. So a blur node is not typically, you don't really want to blur your text out where you can't see it. But in Fusion, every node has a blend parameter. So you can just take this blend and knock back your effect. And that works for transforms, color corrections. So it's just a nice way of building a strong look and just bringing it back, feathering it back with the blend node. So take a look at that stuff and try to explore with it. And next we're gonna add a filter. So if you're familiar with After Effects, you're familiar with doing pre-comps. I know it's constantly pre comping all the time in After Effects. So we're gonna basically do the equivalent of a pre-comp just by taking the output of our filter and dropping it back on top of our blur. So there we go. We just done a pre-comp. And as you can see, with the node it's so visual. You don't have to like jump deep deep into several pre-comps, it's just right there. You can see what you've done, you can see what you added and how it's affecting. So we're gonna add another soft glow. Wait no, how many glows am I gonna add? So let's just bring this down. Just to kind of tweak it in. And then let's add one more glow 'cause I just can't stop myself. And we'll just pump up the glow signs and bring the glow down. Alright, so there we go.
We started to develop a look by just stacking our nodes. Building up organically, and you can change this 1,000 different ways. It doesn't have to necessarily come out this way. But let's look at what we would of done if we were to just done a standard glow. Alright, so. So let me load this into the second viewer here. We can just kind of A B in this. So this is another thing you can do inside Fusion, just kind of A B your effects and compare nodes and see how one works with the other. But you can see the standard node. That's fine, and that may work for what you're doing but you can also do things nice and organically just by stacking up your nodes. So I'm gonna delete that. Go back to A. And as well, you can package this up with just a group node right away, you can jump right into a group node, so now it's nice and neat and it's compact. Let me ungroup that just so you can see it. So we've done our first quote unquote stack, if you will. Now comes the part of duplicate. So let me copy our text node. And instead of just the standard pasting, I'm gonna do shift command v paste. So right away you can see that there's this green line that's connecting the two nodes together. So what is that? In Fusion, that's basically what they're calling an instance. And what is an instance? Well it's a way of duplicating but like a smart duplication or a clone, or smart cloning. But there's like a bidirectional communication to where you do one change in one and it affects the other. So you can have, I can have 10 instances of the same node, and anywhere in my flow, in my pipeline, if I make one change, it affects all those nodes. It's a very very powerful way of working and it's not just for text, it's for any nodes. So it transforms. So you could have multiple transform nodes spread throughout your flow all doing the same animation connected by one set of key frames. So that's a interesting powerful way of working. So I'm just gonna show that real quick.
Let me go to the shading tab here. And you'll see, so on my right side I have my instance of my text. On my left is the original text with all the glows. But if I change the color, it affects them both. So any change, any parameter you do, it just ripples throughout everything. So let's go and undo that. But the next step into that, the next step you can do is you can actually go in and make certain parameters independent as needed. So in this case we're gonna deinstance, sorry this mouse is just a little funky. Deinstance our color group. So now I'm gonna go and change the color. So there we go. So I still have all the same parameters controlled throughout both of the nodes, but now I just made independent the color, right? So to prove that, let's go ahead and change the text. So I'm changing the text in the instance. You can see all these little green lines around everything. Let's change it to faster together. So there we go. Let's go ahead and copy all of our effects, and we'll do the same thing. We'll instance paste those guys. And it's the same procedure for these nodes. Is if I make a change to one of the soft nodes, it's gonna affect the other soft nodes.
So I can mimic and build and stack different versions very very quickly, and then when I need to, step in and deinstance or make independent those parameters that you want. So let's just add a transform node to this pink one. We're going to just increase the size a little bit, and then let's comp this. So could you imagine also pre-comping this as well. It's just very visual, right here, you can see what you're doing and how you're doing it. And let's change this to in, and let's just add a mask, revert that. So you could start to develop interesting looks. But you can see, you start animating the mask, animate the mask with some fast noise, and start to develop some nice organic fluid, transitions from one side to the other, all the same text. If you need to change that text, you just go back to one of those nodes, change, ripples throughout them all. So nice little powerful way of working in 2-D, and this also works the same for 3-D as well. Yes, it works in 3-D. Alright, so let's quickly add a camera. So I had the text node selected, I added a camera, it automatically gave me a merge 3-D. And let's add a render node. I'm gonna view that in the second one. We're not seeing anything yet 'cause I need to add some lights. So let me find my lights. And this is the bin, if you guys are not familiar with Fusion, it has a bin where you can store any presets that you've built, any little special modules that you built, you can just store them in the bin and use them anywhere however you want. You can put them in a text file, email them to somebody else, and now they can use those bins as well. But it also comes with a bunch of shaders, looks, and just things in how to deconstruct other operations in Fusion, so it'll kind of help you jump in.
Alright, so let's plug in these lights. And you'll also notice that our camera is right there in the middle, right? Ground zero. So I'm just gonna kind of find a look that I like and I'm gonna right click in my perspective xyz. Say copy this view to the camera, and there it is. So this is kind of a interesting way of even just animating a camera. I can frame it better for some reason in my perspective view and just say copy that. And if you have key frames attached to it, it'll just make new key frames so you can just kind of build flow and line in a very visual way. And if you need to you can go nitty gritty and work on the xyz panel right over here. But this is a great way of just roughing in some movement. So this is standard 3-D text, right? Nothing to write home about. But this is a good start, a good approach. So let's go ahead and copy all those little glows and whatnot, let's just paste that in. And let's connect that. Now let's look at that here. So we've done something in 2-D, now I'm just dumping it on top of our 3-D render, and it needs some tweaking. We can come back in here and use our blend modes and just kind of blend things back again. So that way they're not too too strong. Bring down some of the glows. Let's bring down some of this, and let's bring down this one as well. Alright, so this is a decent look. And you can change this, again, a thousand different ways. Not just this way. But that same approach of copying and pasting our text, making another instance, right? Let's copy our merge, let's paste it, and you'll see what we'll do. Let's add an overwrite. And let's collect that in, very good. Now so we basically just created a new 3-D scene. Just gonna change the color of this. Let me show you what we're doing here. Change our color. So I've basically just duplicated and created another 3-D scene, right? That's parallel to what I've already created.
Now all I'm going to do is share the same camera and lights into this 3-D scene. I don't have to duplicate the lights, I don't have to duplicate the camera. So it's a very easy way of making multiple 3-D scenes and using the same camera, using the same set of lights. So if you have key frames attached to that, it's all just build once, share as many times as you need. And so now we've got two different views. We've got this view and we've got our original. So let me go and deinstance some of these parameters like the double depth, we're going to turn that off, make that independent. There we go. The width, and the extrusion depth. I'm gonna deinstance. I'm gonna turn down our width and our bevel, and then I'm just gonna increase the bevel depth a little bit. Alright. So now what did we do all this for? Well, now we can take the output render of our face, which is this, drop it on top of our original render. So now we've got a face in 3-D. So by taking that multipass compositing approach you can start to build different 3-D texts and build different 3-D options. You can add glows on top of that, and add other color corrections on top of that, and really go crazy.
Now, let's do some simple, real quick text animation. Go into the follower. The follower is just a sequential text animator engine. Very simple how to use. Let's go to frame five and let's put up our delay to around, there you go. And our shading, let's set a key frame for our opacity. And a key frame for our z space. Hence go back to frame zero and we'll put our pivot at six, and our opacity at zero. Let that cash. So by animating your rectangle you can start to really reveal or distort your text and reveal it underneath. So now back to the 3-D, we can do the same thing. We can take our 3-D and we can connect that animation that we did. So now they both follow. And you want to add motion blur and you want to add more on top of that. So just nice way of stacking your nodes, building your nodes, and coming up with interesting looks not just basic standard glow or basic standard 3-D. Really get in there and add on top of itself, simple pre-comping, just by reconnecting over itself. So just to show you, you can take this a step further.
There's other ways, there's other looks that you can develop. You know, flat looks, cartoon looks, and it's the same approach, right? This one is using, taking ambien and inclusion and warping it and adding different effects to it to really get the look that you want. And then just stacking it on top of each other. Just rebuilding it on top of each other until you get that. And then another one is, it's really endless. But this as well. So taking something that looks like glass and adding other lines on top of it. So it's really endless in how you can develop, you know, start adding shaders to your 3-D text, and then you can make materials that are animating on top of your 3-D text as well. And then lastly, here's one that I did with the red sherwood text. So get some animation on this text. The same thing, just reinstance it. Did a different version of it's layout. Now we're gonna composite that and add some distortion. Just with some displace, right? Just with some displace and some fast noise. And then adding the outline. Hence adding some more distortion and just copying it over itself. So right here, this is the same thing as a pre-comp. And then adding a background.
So there's a lot of different looks and styles that you can create from that approach. So it doesn't just apply to 3-D text nodes, but to everything else as well. And real quick, if you haven't heard, that Resolve 15 now has Fusion inside. So you can take all this same animation and effects that you're doing stand alone, and you can now bring it right inside of DaVinci Resolve. I cut a little thing, a little promo, just to see, can this work? Does it work? How quick and easy is it? And it does work very very nice. Here you go, right inside of Resolve Fusion. Edit page and Fusion page.
I don't know if you realized, I just did a click from the edit page to the Fusion page. But if you really think about it, it's the equivalent of in your editor, exporting whatever you need to export, waiting for that export, closing down the application, opening up After Effects, importing your footage, organizing, designing, render, close, import back into your editor. One click over, that fast. No more, none of that, it's all gone right inside of a Fusion. So real quick, just to show you that yes, it works. I took their logo and then I put into it into a texture. I also made a, this is very sticky, this surface, made a bump mat out of it, put it into a shader onto an image plane, and then added some lights, just animated some lights. I'm gonna turn the 3-D lights on. So you can see on the right side. Now, you know, it's got a little bit of a glint, right? Just a little hint of a glint it's animating. And then it converts right into it's full screen, the regular logo. So it's extremely powerful now, there's no excuse. You can go straight from editorial, jump right into Fusion, do your animation, do your visual effects, and back into Resolve for editorial, literally with a click of a button. So if you guys haven't downloaded it, go check it out. It is available now as a public beta. That's my presentation. Hope you guys learned something and let me know if you guys are jumping into Fusion. I'd love to hear your conversation, so thanks.


 Mobile
 Tower
Tower
 R24
R24
 Builder
 Manager
 Connect
 Kyno
Kyno
 Media Engine
 Remote Access
 Support
