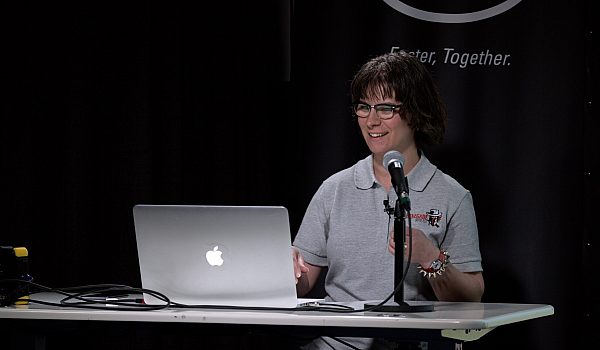
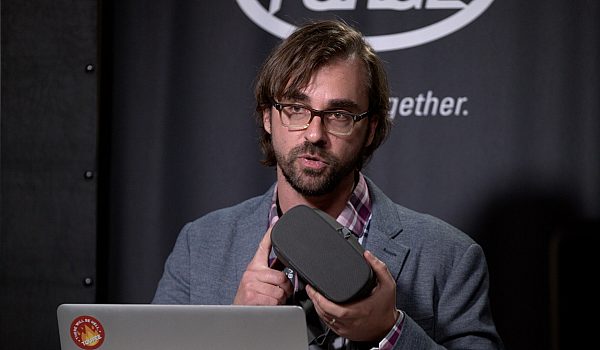
Kelsey Brannan, aka Premiere Gal, walks us through creating Templates in Premiere Pro using both the Media Browser and the Essential Graphics Panel.
Templates can help save time, keep you on-brand, and can be sold online to other editors!
I just want to show you how I have built templates to edit faster with my team, with my social media team, and also hope that I can enlighten your world to build your own templates. Before I go into detail on the templates, I just want to give you a little bit of information about me. So I'm a shredded or by day a shooter editor, producer and I work for the Bureau of educational and cultural affairs at the state department and I've been there for the past four years as a federal contractor on a pretty small team and I make sure it promo videos for social media and YouTube, um, documentaries about our international exchange programs that we sponsor. So I don't know if you guys have ever heard of the Fulbright program. That's one of the programs that our office sponsors and there's like hundreds of them.
So that's been super fun and I've learned a whole lot through that process and kind of innovated. And lately I've been doing some stop motion promos and started building some templates to share with my social media producers since they don't really know how to use after effects or Premiere pro. So I was like, since we have a small team, what if I could build some templates? And then by night I started a training channel, sort of a video editing channel called Premiere gal. And sometimes my dog makes a special appearance, I call him Premiere pup, but his actual name is spike. And it's a great way for me to sort of learn and also share information. And I also started on my website Premiere gal.com a tutorial request page. So that way if people, beginners or anybody are welcome to say, Hey, I need to learn how to do this.
And I do pretty high quality tutorials and it's completely free. So it's been super fun doing that. And recently on the channel I started making some free templates and also selling them. So in this talk I'm going to talk about, you know, why build your own templates, why and how. And I'm going to demo and show you some of the templates that I've made, sort of open them up to sort of see how I made them. And then I'm also going to go into the new release called essential graphics panel that was just released last week on April 19th which is completely changing the way that we're doing titles and Premiere. And then I just hope to show the value to you and to start making your own. So Premiere templates, why are they important? So they save you time with your team. So for instance, as I was saying before, you know I have my social media producers, we have a small team at the state department and they don't really have the technical skills to build stuff and Adobe spark has limitations.
It's just sort of a 16 by 9 you can't do the square social media, which is really popular now. And I'm sure that you guys have seen those videos now where people are just watching without the sound on and it's just, you know, subtitles coming up and stock video. And that's some of the stuff we do for like international days. And so I was able to build some square templates to pass onto them so it saves you time and also it keeps you on brand. You know sometimes social media coordinators aren't that design savvy and don't have the color palettes in place, the same font. So I'm able to embed that within the template and then they can open it up and stay on brand and they're adaptable. You don't have to stick with all of the, you know, key frames that I include in the animation portions they can learn as they go along and become better and you can sell them if you want to on different sites.
So I also want to differentiate project templates and individual asset templates. So the project templates are an entire video that I create as a template so people can edit it and export it as its own video. Okay. And individual assets are like call out boxes. I actually have this free call out box template on my YouTube channel that you can download, lower thirds logo reveals and stuff. Those are assets that you can include in your larger projects. Right? So you guys understand the difference between the two. Cool. So let's go ahead and see some of these templates and action. Let me open up Premiere pro here. So this is a template that I created. Um, ECA, if you see in the corner there, that is the name of the Bureau of educational and cultural affairs. So this is actually just a little template that I put together. Very basic.
It's just a photo sort of zone zooming in. And then you have the title here where they can edit and they transition on and off. It's very basic. Um, but again, it's the font that we use and they can literally just go in and replace those photos with video stock, video or actual photos that we've taken. And if you see here in the timeline, there's a series of sequences that I've called placeholders in here. You can see that I just included insert title type hashtag, all of that stuff. So let me make this a little bit bigger here for you. So let's say one of my social media producers wanted to edit this photo here. All they had to do is open up placeholder. I call it P H placeholder. Just open that up and here is two layers. I have a title right here and a photo underneath.
So if they wanted to replace this photo, what you can do is actually go and import photos here in the project panel. And what I'm going to do, it's kind of tiny here. I have these photos here already. Let's say I wanted to change it to this photo. All you had to do is go over here, right click and click on replace from Ben. And what that's going to do is just replace that photo with the file that I have selected in the vent. So if I hit that now I have that photo in place and of course it's not the same size so you have to go on and make some further adjustments if you think it's necessary cause not all photos are the same size. So I told my social media producers, I was like, look, you probably have to go up here and to the effects controls and probably make some changes to the scale over time to make it work.
And then up here and the title in this layer, you could just open that up. Now this is the legacy or tool because now it was replaced by the essential graphics panel. You can still use this title or tool though. This is the older version. It's now called legacy. So I could just go in here and make type whatever I want. So, Oh my forge is awesome or something. Or fab. So this is just a way that you can share this template with somebody else and have them edit it. So I'm actually going to be making some square a templates on my channel very soon. But I found that a lot of people are looking for this because you can't find a lot of square templates. It's a fairly new thing and you can also use them on Instagram. So another template that I created, um, is split screens.
So split screens. Um, I don't know if you guys have ever seen like acapella singers on YouTube where they have like the base, the singer, the guitar player. I actually had a musician request this asset from me being like, Oh, it takes so long to have to divide up the screens each time. Can you make a template? And I was like, yeah, I can do that. And it does take a lot of time. So, um, I'm gonna show you right now. How do you open up a template within an existing project? So let's say you're working on a project, you download a template. How do you open it up? Don't you have to reopen the project? Well, actually you can use the media browser right here and you can find the project file. So I have the split screen here and right now you can see that there's all these folders here.
It's pretty tiny. But basically I have these final sequences here and if I double click on it, it'll start to import that project into this existing project. So you can see here, if I play this back, I made a series of split screens. And so you know there's four in this one here and I actually here you can see I put the pixels here at six 40 by 10 80 it was just sort of basic math dividing up the frame. And so I made a series of split screens that people can use and just drag and drop as I showed you before the content. So let's say that I wanted to import this actually in the project cause right now if you see here, it's actually pretty tiny. It says it's just in the source monitor. Okay? So that means it's just being shown here.
It's not actually in the project yet. So to do that, you can go back here, you can create a Ben. I already created one here called split-screen templates. And just literally click on the source monitor media here in drag and drop it into the folder. And what this will do is import everything into the project. So now you'll see that I've nested all of these sequences here. If I open this up here and all templates. Now it does not say source monitor. So let's say you wanted to edit this split screen, all you have to do is double click on it, double click on it again cause I have a few nested and you can see now all the layers that were in that sequence are in there and you can edit the placeholders. So if I wanted to edit one of these photos, just double click on it.
Go over here to your stock video if you have any imported and I can just drag and drop a new video on top. This is a dog sticking his head out the window here and you can just go up here and resize it however you like moved the position. And now if I go back to placeholder or template to here, I can find it. There we go. Now you can see that the dog's head was replaced here and then you can of course get rid of the title here. But this is just a quick way drag and drop. Everything is divided up, really easy to work with. And so before I close here, I wanted to show you the new essential graphics panel and what that does. So I have a new sequence here that's empty. And so if you go down to new item in the project panel, you'll notice that the title or tool is gone.
It's no longer here, it's been replaced by a type tool. So it's here in this toolbar, it's called a type tool. If you click on it and then you just sort of click in the program monitor here, you can type out a text here. It's really tiny. Let's make that bigger. And this is all editable in the essential graphics panel. And if you don't find it here, you can go up to window and go to a central graphics. So you need to have it highlighted before you resize it. So I'm just going to make this a bit bigger here. And the great thing about this new panel and the reason why it's so awesome is that what we've been waiting for is to actually have the Photoshop layer feature inside. So now you can actually create layers. So if I wanted to make a rectangle to go behind this text, you would just click on this little new item icon here in new layer actually, and here it has a little dropdown of different things that you can create.
You can even insert a graphic from the file that's phone. Wanted to make a rectangle here. I'm going to just go to my selection tool and I can just click and move this around, make it bigger in the program panel versus having to do this in the title or tool before. If you're familiar with Premiere pro and you notice that the text is now not here, so what I have to do is just literally drag this layer over here in the, in the essential graphics panel below and then you can of course center the stuff. There's the center horizontal and vertical, and you can do the same with the text. Now let's say you wanted to save this for future and make this a template for an upcoming video project that you're working on and you want to share it with somebody else. You can actually control, click on this or right click on it and export as a motion graphics template.
So there are now files called dot. M O. G. R. T. it's like McGirt. I don't know what people are going to start calling it, but that is what it is called. And you can actually save it to your creative called library and share it with your team that way. Or you can save it to your local drive or save it directly to your essential graphics panel. So that's pretty cool. And you can also, you'll notice that the one part that was confusing to a lot of people because it's not as intuitive as what we had before. Right now, where is this asset that I just made? It's not in the project panel. This is something they're probably going to work on. So what I have to do is actually just click on the new title that I made here in the, in the timeline and drag it into the bin.
And then now you'll see, it's kind of hard to see, but there's now a new uh, graphic layer here and you can rename it whatever you want. So that's a way to get it into your bin. Lastly, um, if you go up to browse and the essential graphics, uh, Premiere pro now has a bunch of templates that are already made including social media. We also have some captions and subtitles and so it's a starting point. These are all McGirt files that we can just click and drag and drop into the sequence and it will take a second to download it from the cloud. And what you can do is edit it from there. So this is a great thing that's going to be coming out more and more. If you ever went to videohive.com or motion array Vick, they're going to start creating Margaret templates for Premiere pro.
What I'm trying to tell you guys is that if you work on a small team, I would highly recommend starting to make these type of templates because it's really going to assist in your workflow. And you can also become a producer for a motionarray.com. They're looking to hire people and you can make a certain royalties off of what you sell and you can also make your own. I started selling my own, um, photography templates for photographers. So it's like a slide show on my website, Premieregal.com/store. And I also have a couple of free templates on my YouTube channel. So, um, that's it.


 Mobile
 Tower
Tower
 R24
R24
 Builder
 Manager
 Connect
 Kyno
Kyno
 Media Engine
 Remote Access
 Support
